
Level 5 Drywall Finish: When a Mountain Home Needs One
Showcase Drywall · Eagle, Colorado · 26 years in the valley
A Level 5 drywall finish is a skim coat of joint compound applied across the entire surface of the wall or ceiling, over the top of a standard taped and coated finish. It is the highest of the six drywall finish levels in the industry standard, and the specifications below it stop short of the full wall. In a mountain home with tall windows it is often the difference between walls that look flat and walls that show every joint by mid-afternoon.
This article explains what the levels mean, when Level 5 is worth paying for, when it is not, and how the finish is actually applied. If you are building or remodeling in the Vail Valley, the short version is this: specify Level 5 on any large surface that faces a window, and Level 4 almost everywhere else.
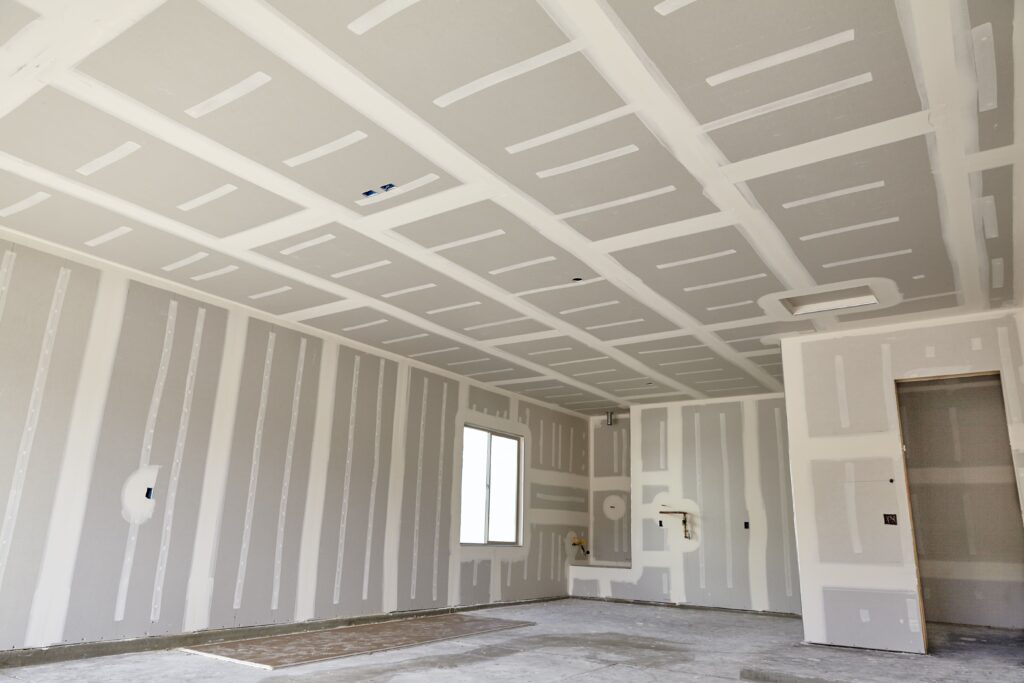
The drywall finish levels, briefly
The finish levels are a published standard, not a marketing invention. Each level describes how much drywall finishing work goes onto the board after it is hung.
| Level | What is applied | Where it is used |
|---|---|---|
| 0 | Nothing. Board is hung, no tape, no compound | Temporary construction, mock-ups |
| 1 | Tape set in joint compound, no further coats | Concealed spaces above ceilings |
| 2 | Tape plus one thin coat over joints and fasteners | Garages, warehouse walls, surfaces behind tile |
| 3 | Tape plus two coats | Heavy texture to be applied over the top |
| 4 | Tape plus three coats, sanded smooth | The standard for most painted walls and light textures |
| 5 | Level 4 plus a thin skim coat of compound across the whole wall | Critical lighting, gloss or dark paint, large flat surfaces |
Everything up to Level 4 treats the drywall joints and the fasteners. Level 5 treats the whole wall. That difference is the point of the finish, and it is why the price moves.
What a Level 5 finish actually fixes
Flashing
Drywall compound and paper-faced drywall absorb paint at different rates. On a Level 4 drywall wall, the coated joints are slightly less porous than the paper between them, so paint dries to a slightly different sheen over each. The effect is called flashing: in the right light you see pale bands running the length of every joint and a faint dot at every screw.
The skim coat on a Level 5 drywall finish puts one continuous layer of compound across everything. The joints and the field of the wall then take paint identically, because they are the same material. Nothing flashes, because no difference is left to flash.
Joint banding and ridges
A taped drywall joint is slightly thicker than the board around it. A good finisher feathers that out so you cannot feel it, but the wall still has a very slight crown. Under flat light this never shows. Under raking light, that crown casts a shadow the width of the joint. The skim coat reduces the difference between the joint and the wall to almost nothing.
Fastener dimples
Every screw sits in a small depression, filled with compound. On a Level 4 finish each one is filled and sanded and almost invisible. Almost. On a long smooth wall in afternoon light, almost invisible turns into a grid of faint dots. The skim coat on a Level 5 drywall finish removes the pattern.
Texture differences from patching
If any part of the wall has been repaired during construction, which happens on nearly every job, that drywall patch sits at a slightly different density from its surroundings. A skim coat over the whole wall levels the difference out.
Why light is the deciding factor
The standard does not say to use Level 5 everywhere. It says to use it where lighting conditions are severe. The industry phrase is critical lighting, and National Gypsum’s guidance is explicit that natural light and critical lighting call for the higher finish, and that surfaces should be judged under the light they will actually live under, not under a work lamp.
Here is the physical reason. Light hitting drywall straight on fills in every small depression and hides it. Light arriving nearly parallel to the surface, which is what a tall window or a row of high clerestory glass produces, rakes across the wall and turns a half-millimetre ridge in the drywall into a visible line with a shadow beside it.
Mountain homes are built around exactly that geometry:
- Tall glass on the view side, often two storeys
- High flat ceilings with a single light source from one end
- Open stairwells with a window at the top and a long blank wall beside it
- Snow outside for months, which turns the whole landscape into a reflector and fills the room with low, bright, directional light
Drywall that passes inspection at nine in the morning can be unacceptable at four in the afternoon in the same room. That is not the finisher being careless. The light changed.
Paint makes it better or worse
Two paint decisions interact with the drywall finish:
Sheen. Flat and matte paints scatter light and hide small imperfections. Eggshell shows more. Satin, semi-gloss and gloss act like a mirror and reveal everything. Gloss paint on a Level 4 drywall wall in daylight is the worst combination available.
Colour. Dark colours show surface variation far more than pale ones, because the eye reads the shadow against the dark field more easily. A deep charcoal feature wall is a Level 5 wall, whatever the lighting.
Where Level 5 is worth it, and where it is not
Specifying the whole house at Level 5 is a way to spend money without improving what anyone sees. A sensible specification looks like this.
Specify Level 5 on:
- Any wall with a large window in the same plane or opposite it
- Two-storey walls and open stairwells
- Flat ceilings in rooms with a single directional light source
- Any surface taking a gloss, semi-gloss or satin paint
- Any surface taking a dark colour
- Feature walls that will be lit deliberately with wall washers or picture lights
- Smooth walls in a room where no texture is being applied, since texture is the other way to hide a joint
Level 4 is right for:
- Bedrooms and bathrooms with ordinary window sizes
- Hallways with no raking light
- Any wall receiving a knockdown, orange peel or hand texture
- Closets, pantries, utility rooms
- Garages, where Level 2 or 3 is often sufficient
The rule of thumb that holds up in these homes: walk the room at the brightest time of day, stand where someone will sit, and look along each wall rather than at it directly. Any surface where you can see along the plane needs the higher finish. Any surface you only ever see face-on does not.
How a Level 5 finish is applied
Knowing the sequence helps when you are comparing bids, because a finisher who describes it this way is quoting the real thing.
- 1. Hang the drywall. Joints are planned to fall away from the most visible sight lines where the framing allows. Butt joints in the middle of a long span under raking light are a problem no amount of compound fully solves.
- 2. Tape. Tape is embedded in a layer of drywall compound at every seam, and corner bead goes on the outside corners.
- 3. Fill and coat. Two or three layers of compound over the drywall seams and the fastener heads, each one wider than the last, each allowed to dry before the next.
- 4. Sand. The seams are sanded flat and feathered into the drywall. This is the Level 4 finish, and on most of the house it is where the work stops.
- 5. Skim. A thin layer of compound goes across the entire wall. It can be rolled or sprayed on and then pulled off flat with a blade, or laid on directly with a wide trowel. Either way the goal is a continuous film with no holidays and no tool marks, which is why the skim goes on in one pass rather than in patchy coats.
- 6. Final sand. The skimmed drywall is sanded, usually with a light on a pole held close to the surface so the sanding is done under the same raking light the window will later provide.
- 7. Prime. A primer goes on and is inspected. Primer is where remaining flaws appear, because it is the first uniform colour on the wall. Any touch-up happens here, then gets spot-primed again.
Steps 5 through 7 are the Level 5 finish. An extra coat, an extra sanding, and an inspection done properly.
Why it costs what it costs
The materials barely change. A skim coat uses more drywall compound, and compound is inexpensive. What changes is labour and time: an additional coat across every square foot of drywall, an additional full sanding, and another day in the schedule because the coat has to dry.
That is also why a Level 5 finish cannot be added at the end of a rushed job. It is a step in a sequence, and the sequence has drying time in it.
Doing it on tall walls and stairwells
The hardest Level 5 drywall in a mountain home is the tall work, and those surfaces usually need the finish most, because they are the walls beside the windows.
The problem is reach. A finisher on a ladder can hold a blade flat against the wall within about an arm’s span. Beyond that the blade tilts, and a tilted blade leaves a ridge. On a 20 foot stairwell wall, work done from a ladder tends to be excellent at chest height and progressively worse towards the top, which is the part everyone sees from the landing.
Proper staging fixes this. Scaffold or a rolling tower lets a finisher stand square to every part of the drywall and pull a consistent coat from top to bottom. It takes longer to set up and it costs more. It is also the only way tall drywall comes out flat.
This is worth asking about specifically, because staging is invisible in a bid. Two quotes for the same stairwell can differ by days, and the difference is whether anyone plans to stand level with the top of the wall.
Level 5 in a finished, occupied home
New construction is the easy case. The more common job in the Vail Valley is a finished home where the owner wants dated texture gone: a heavy hand texture from 20 years ago, or a knockdown that has been patched too many times.
That work is a skim coat over the existing texture, built up until the surface reads smooth, then sanded and painted. It is the same principle as a Level 5 finish on new board, with more material and more sanding, because the starting surface is not flat.
In an occupied home the sanding is the issue. Sanding drywall compound produces fine dust in quantity, and it travels. The way this is managed is by sealing the work area with plastic sheeting, protecting floors and furniture, and cleaning at the end of each day rather than at the end of the job.
Showcase Drywall did exactly this job on a home in Strawberry Park, Beaver Creek: a heavy hand texture stripped from two stairwells and the hallways connecting them, every wall skim-coated to a smooth Level 5 finish and repainted, with the home furnished throughout. Ten days, each work area tented, and no drywall dust in the rest of the house.
Comparing drywall finishing estimates
Two drywall estimates for the same house can differ by thousands, and finish level is usually the reason. When you read an estimate, look for these things:
- A finish level stated per room. An estimate that says "drywall finish throughout" is quoting Level 4 and leaving you to discover it.
- Skim coat included or excluded, named as such, for the rooms where you asked for it.
- Staging for tall drywall. An estimate with no line for scaffold on a two-storey wall is an estimate for work done off a ladder.
- Primer and inspection. Who primes, who looks at it, and under what light.
- Sanding and dust control, particularly in an occupied home.
If one drywall estimate is much lower than another, compare those five lines before you compare the totals. Nearly always the cheaper estimate is for a Level 4 finish on walls you wanted skimmed, and the gap is not a discount. It is a different specification.
An honest estimate also says where you do not need the upgrade. Any drywall estimate that quotes the entire house at the top level is either not thinking about the rooms or is happy to sell you compound you will never see the benefit of.
Drywall finishing in a valley home, room by room
It is easier to see how this works by walking a typical home in these areas.
The great room. Two-storey glass on the view side, a flat ceiling, pale walls. This is Level 5 on the window wall, the two walls perpendicular to it, and the ceiling. Raking light hits all four surfaces at some point in the day.
The stairwell. A window at the top, a long blank drywall wall running up beside it. Level 5, with staging, and the finishing done from a platform rather than a ladder.
The primary bedroom. Ordinary windows, flat paint, perhaps a dark accent wall. Level 4 on three walls, Level 5 on the accent wall because of the colour.
Bedrooms and bathrooms. Level 4 throughout. Nobody looks along these walls, and the drywall is broken up by cabinetry, tile and fittings.
Hallways. Level 4 unless a hallway runs towards a window, which in these homes it often does. Then the end wall gets skimmed.
The media room. Dark paint, deliberate lighting, usually Level 5 on anything the wall washers touch.
Garage. Level 2 or Level 3 is normal, and plenty. Finishing a garage to a smooth drywall standard is money spent on a room with fluorescent light and bicycles in it.
That specification costs a fraction of finishing every room at the top level, and the finished house looks the same to anyone living in it.
Where we do this drywall finishing work
Showcase Drywall finishes new drywall and refinishes existing walls across the service areas of Eagle County, and takes work across all of the areas listed above: Vail, East Vail, Lionshead, Beaver Creek, Bachelor Gulch, Arrowhead, Avon, Edwards, Cordillera, Eagle-Vail, Minturn, Eagle and Gypsum. We also work in the areas of Summit County and in the Roaring Fork Valley.
Most of the skim coating we do in the upper areas, and in the areas further down the valley, is in finished homes rather than new construction, which is why dust control and daily cleanup matter as much as the coats themselves. Owners in those areas are usually living in the house while we work, and the areas we tent off are the areas they cannot use.
What the finish levels cost you in time
The specification is not only a quality decision, it is a schedule decision, and on a build where other trades are waiting the schedule is usually what decides.
| Specification | Coats of compound | Extra days on a typical great room |
|---|---|---|
| Texture to follow | Two | None, texture hides the rest |
| Level 4 | Three | Baseline |
| Skim coated | Three plus a skim | One to three days, depending on the area and drying time |
That extra time is not padding. Each layer has to dry before the next, and a skim coat over a large area dries slower than a narrow band over a seam. Rushing either produces the exact defects the higher specification was bought to prevent.
The practical consequence for a build is that the specification has to be decided before the drywall is hung, not when the painter arrives. By then the schedule has no room in it and the answer becomes Level 4 by default.
Questions about the Level 5 drywall finish
Is a Level 5 drywall finish the same as a smooth finish?
Not quite. A smooth wall is one with no texture applied. It can be finished to Level 4 or Level 5. All Level 5 drywall is smooth, but not all smooth walls are Level 5, and a smooth Level 4 wall is where most flashing complaints come from.
Can I apply texture over a Level 5 finish?
You can, and it is a waste. Texture hides the same flaws the skim coat fixes. If a surface is getting a hand or sprayed texture, Level 3 or 4 is the correct specification.
Does primer do the same thing?
No. High-build primers and surfacers help, and they are not a substitute for a skim coat of compound. Primer fills nothing structural; it evens out porosity. If the surface has ridges, primer gives you ridges in a uniform colour.
How do I tell what drywall finish level I have now?
Look along a wall near a window in the brightest part of the day. If you can see pale bands running floor to ceiling at regular intervals, or a faint grid of dots, you have a Level 4 finish in a location that wanted Level 5. If the drywall reads continuous from every angle, you have either Level 5 or a texture doing the same job.
Can a Level 4 wall be upgraded later?
Yes. A skim coat can go onto a painted wall, then be sanded and repainted. It is more work than doing it during construction because the room is finished and has to be protected, but it is a normal job and it is how most of these walls get fixed.
Who decides the finish level, me or the builder?
You do, and it should be in writing before the drywall is hung. In practice, if nobody specifies it, the drywall gets Level 4, because that is the default. Deciding room by room, before the board goes up, is how you avoid paying for a whole-house upgrade you did not need or living with a wall you dislike.
Is a Level 5 finish only for new construction?
No. Roughly half of this work in these homes is refinishing: existing drywall, existing texture, a new smooth surface over the top.
The order the trades have to work in
A skim coat only works if the trades either side of it do their part, and in a mountain home that sequence is tight.
Before the drywall crew skims, the framing has to be straight. A skim layer is about a millimetre thick, so it corrects texture, not geometry. A bowed stud shows through the skim exactly as it showed through the board, and the fix for that is on the framing, before any drywall goes up.
After the skim, the painter matters as much as the finisher. A skimmed wall wants a primer that seals evenly, and it wants to be inspected with a lamp held close to the drywall before any topcoat goes on. Paint is where a skimmed wall either pays off or disappoints: the right primer and two even topcoats of paint make the whole wall read as a single plane, and a thin single coat of paint over it throws away most of what the skim bought you.
The last link in that chain is the lighting plan itself. Wall washers and recessed fittings aimed down flat drywall are the harshest test a wall will face, and if the lighting plan changes after the drywall is finished, the wall it is aimed at may need more work than anyone budgeted.
What to ask for when you specify it
If you want this right, put four things in your scope:
- The finish level, room by room, not one level for the whole house
- Which surfaces are getting a gloss or dark paint, so the finisher knows where the light will be unforgiving
- How tall surfaces will be reached, specifically whether staging is included
- Who inspects the primed surface, under what light, and what happens if something shows
A finisher who welcomes those four lines is the one you want. The finish is most of what you will ever see of the drywall for as long as you own the house.
Showcase Drywall has been finishing drywall in Vail, Beaver Creek, Avon, Edwards, Eagle and Gypsum for 26 years, in homes and in buildings where the surface has to be perfect under hard light. If you are planning new walls or refinishing existing ones, call (970) 977-0247 for a free estimate and we will walk the rooms with you and tell you which ones genuinely need the higher finish.